One of the latest additions to Windows 365 is a long awaited one: the ability to ‘stream’ applications, as opposed to an entire desktop, to end users. Windows 365 Cloud Apps wil give you the ability to deliver indiviudal apps, without the hassle of maintinging images or application installs, all because of the power of Intune.
In this blogpost, I will walk you to the setup proces of Windows 365 Cloud Apps, so you can start streaming your apps within no time.
Prerequisites
First, let’s have a look at what is required to stream your apps.
Licensing
To use Windows 365 Cloud Apps, you’ll need a Windows 365 Frontline License. Licensing for Cloud Apps use the Frontline Shared model, which means you only pay for the amount of concurrent sessions. You don’t license individual users, but you decide the amount of Cloud PC’s that should be active for your app, and pay for that amount.
Images and applications
I’ll make the assumption that you want to deliver apps that are not in the default Windows 365 gallery images. You have two ways of getting these apps available as a cloud app.
Adding a custom image
When you upload a custom image, Windows 365 Cloud Apps uses a PowerShell script to scan the start menu in that image for any available apps. This does have some implications: if you have policies in place to limit the use of PowerShell, apps can’t be discovered.
Autopilot device preperation policies
You can use an AutoPilot Device Preparation Policy to make sure that apps that you have available in your Intune app repository are installed upoon provisioning the Cloud PC. This way, the apps are available to publish as a Cloud App.
This approach provides the most flexibility: the app install is seperate from the OS Image, so you can update either one of them without touching the other. Furthermore, you existing investment in packaging apps for Intune - so you can deploy them to your Intune-managed endpoints - can be used to publish these apps as a Cloud App. No more double work! I will focus on this approach using the Device Preperation Policies in this blogpost.
Getting everything set up
Okay, we’re ready to get going! We’ll start with setting up all the different components to be able to publish your first app.
Application
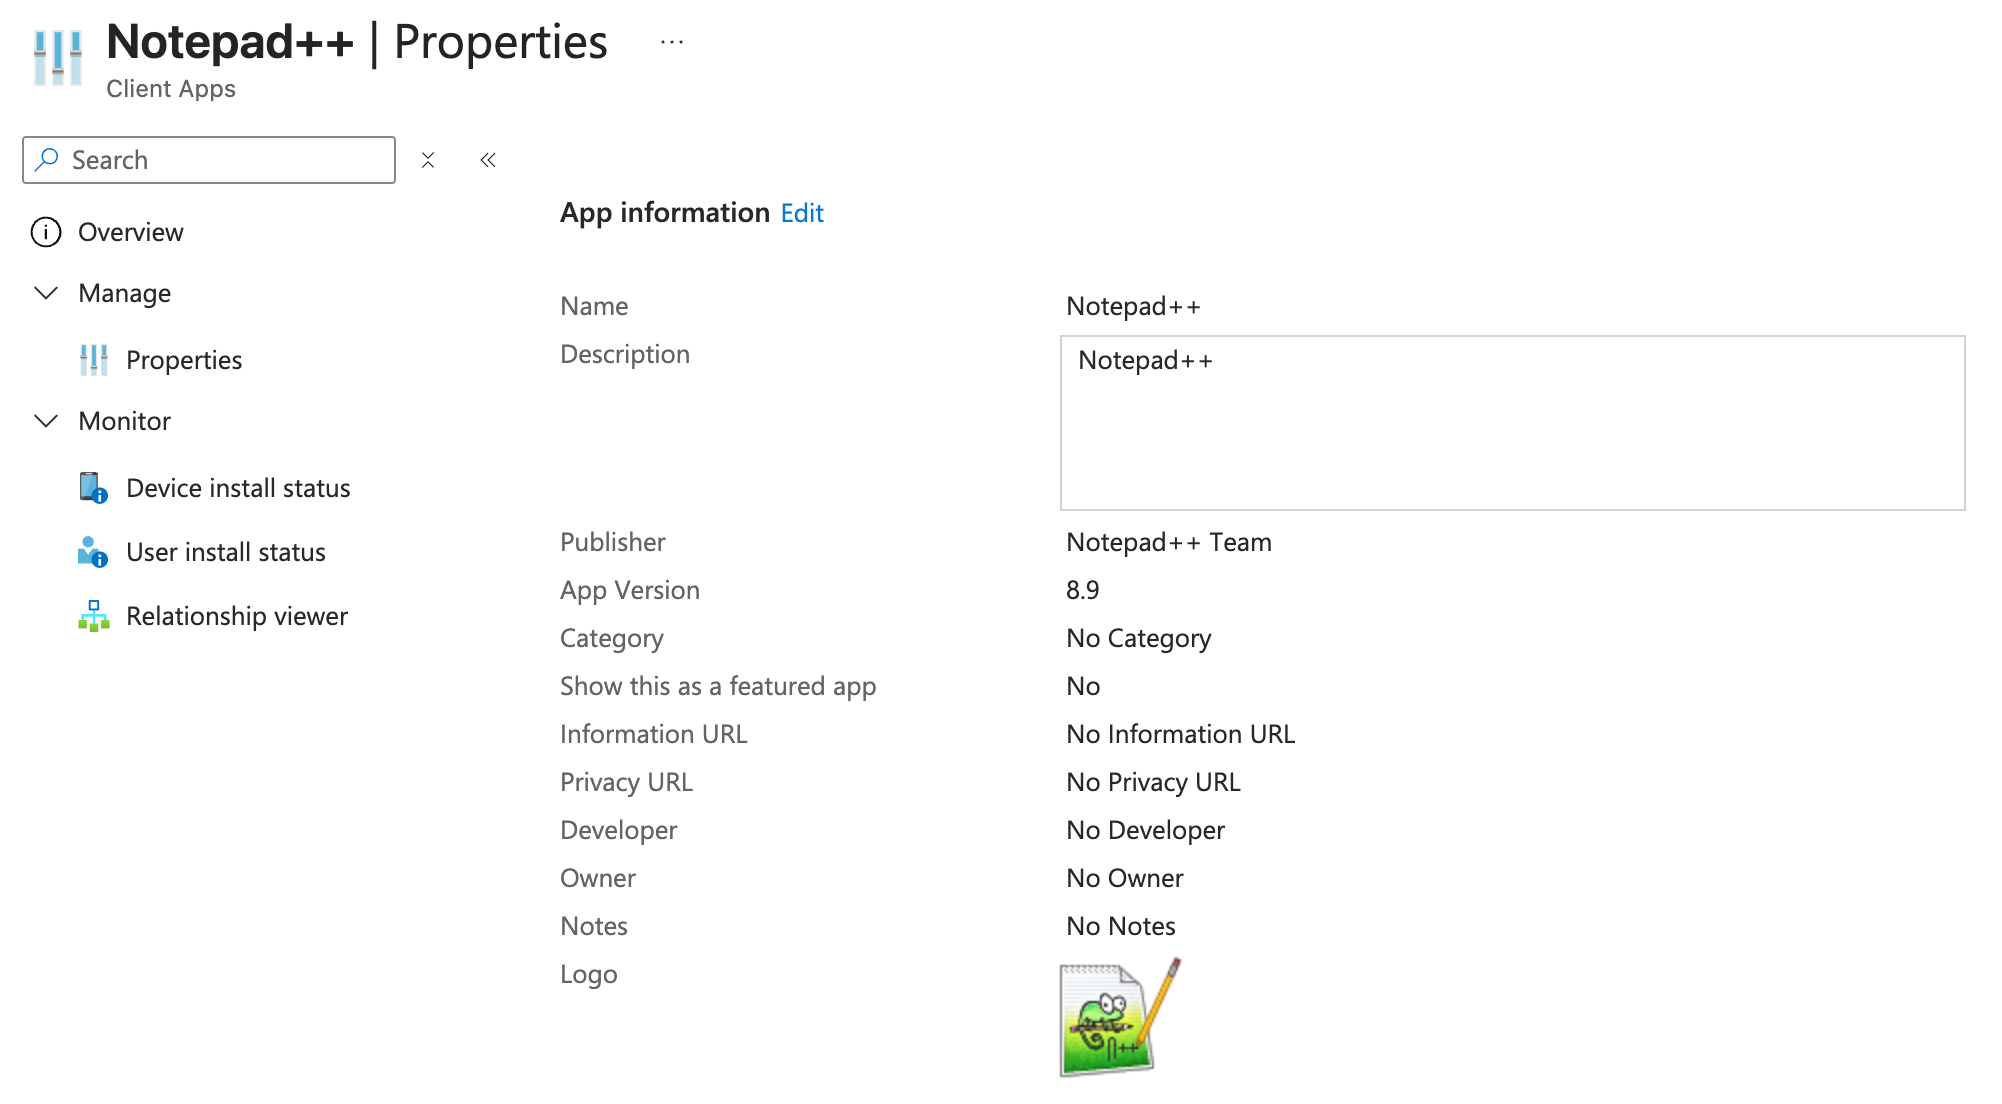
As mentioned, I’ll opt for the Autopilot Device Preperation option for this blogpost. I’ll just assume you already have some Windows Apps configured in Intune - I have Notepad++ available, for which I have created an IntuneWin package using WinTuner.
Entra ID Groups
For managing our deployment and the Cloud PC’s we’ll need two seperate groups in Entra ID.
Group for Cloud PC Devices
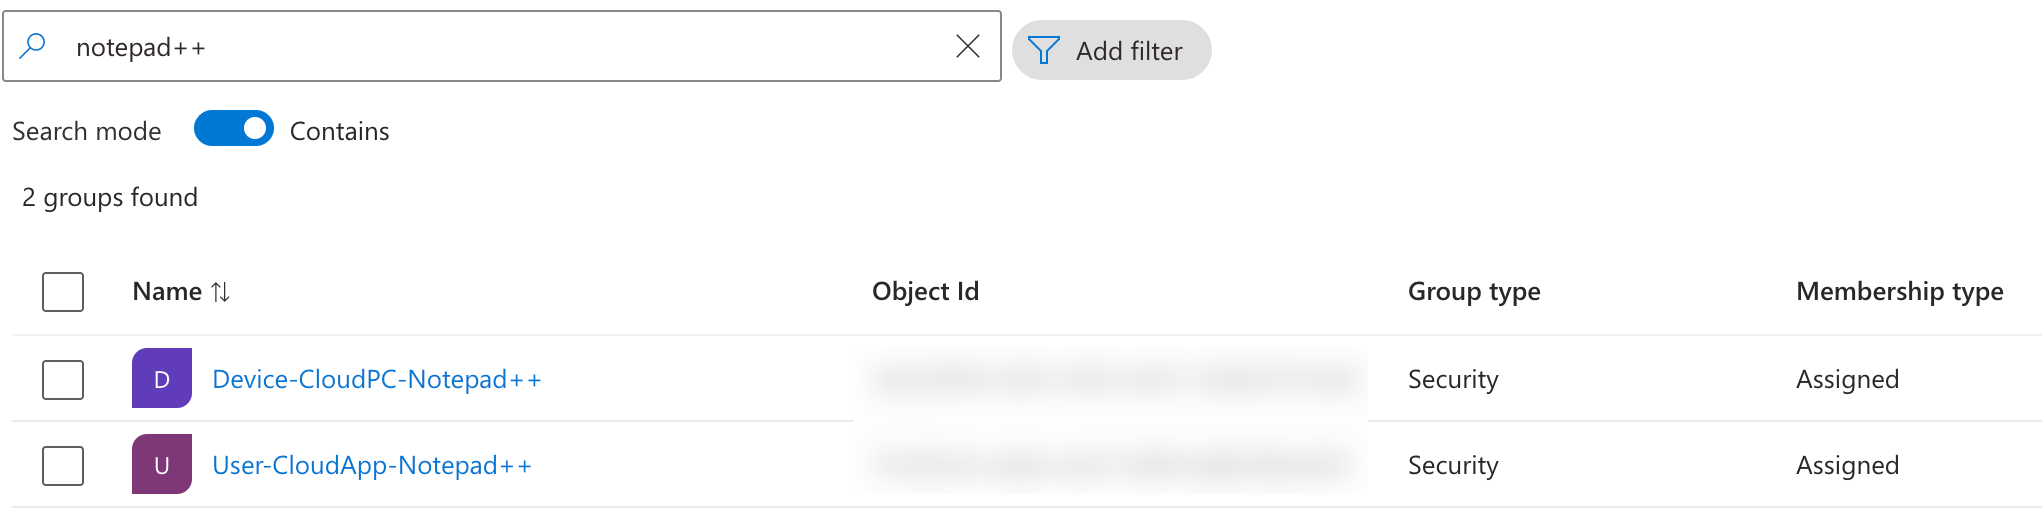
After we create the provisioning policy later on, the Device Preperation Policy will take care of the preperation of the Cloud PC’s. In this process, the actual Cloud PC’s will be added to an Entra group for management, targetting polcies, etc. It’s a good idea to create this group upfront, so you can select it later on when creating the Device Preperation Policy. I’ll just give it an easy name, like Device-CloudPC-Notepad++. This is just a stic group, the device preperation policy will take care of adding Cloud PC’s to this group.
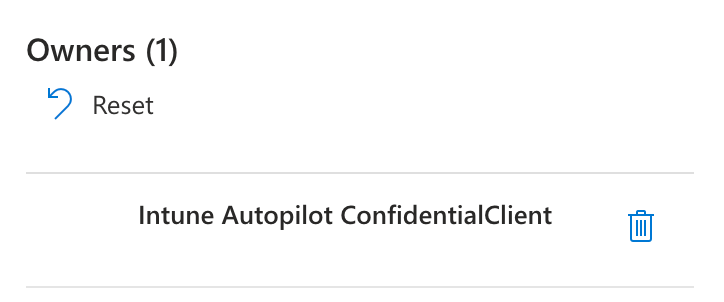
When setting up the group, make sure you add the Intune Provisioning Client or Intune Autopilot ConfidentialClient as an owner off the group. This will grant access for the Device Preperation Policy to add the provisioned Cloud PC’s to this group. If you don’t see one of these Service Principals (with the App ID f1346770-5b25-470b-88bd-d5744ab7952c) in you environment, you can use the instruction on Microsoft Learn to add the Service Principal.
User group for assigning apps
The second group we’ll create, is a group that contains the users that should have access to the published Cloud App. I’ll use the User-CloudApp-Notepad++ group, and add my own account as a member of this group.
When we’re done, we now have the two groups in Entra ID:
Assign Device Group to Application
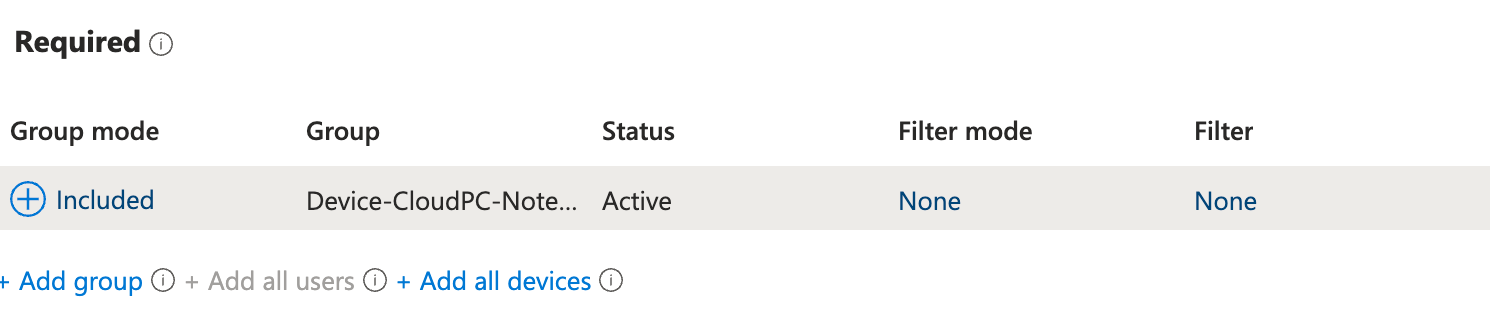
To make sure the application that we want to publish as a Cloud App is installed onto the Cloud PC during the preperation phase. So, we add the device group created previously as a required assignment to the app.
Device Preperation Policy
The next step is to prepare a Device Preperation Policy. This policy will make sure that Cloud PC’s are ready for use after the initial provisioning, by installing apps and running scripts that are not included in the image. It will also add all devices that are provisioned to the device group that we created earlier. Device Preperation Policies can be created in the enrollment blade in the Intune Management Portal.
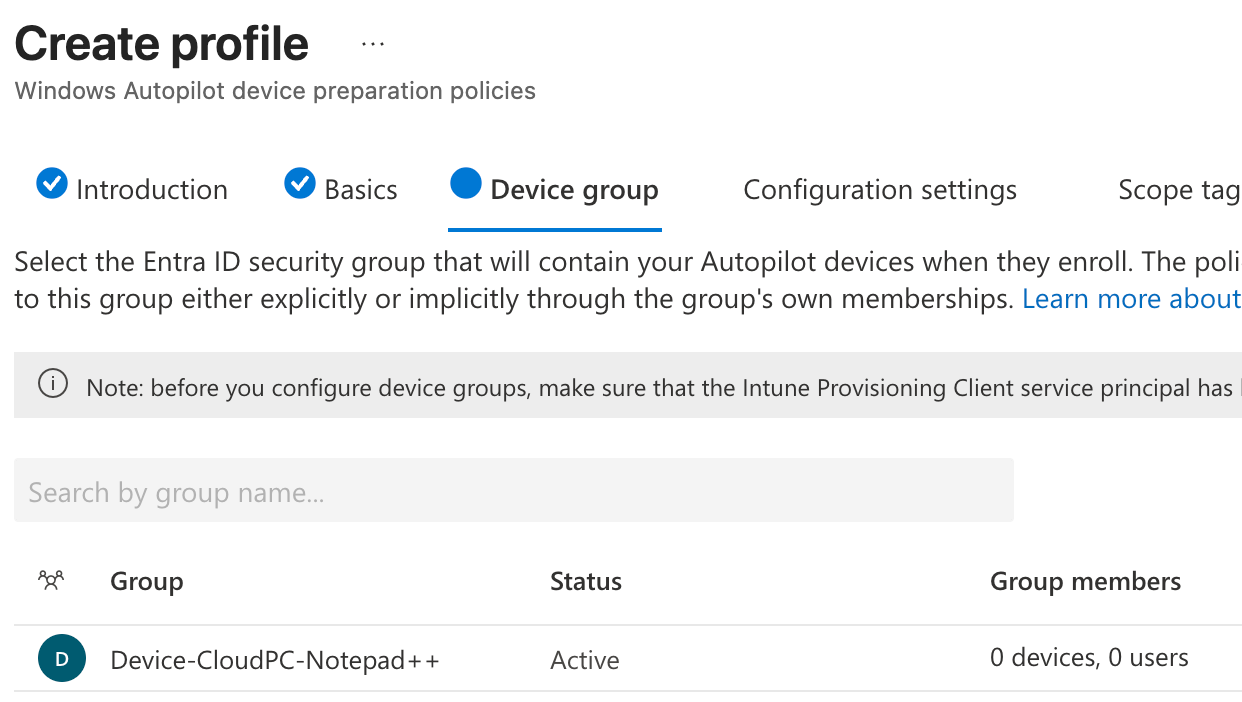
We’ll create an automatic preperation policy and run through the wizard. I’ll name it Notepad++ Provisioning. On the ‘device group’ part in the wizard, we’ll select the device group created earlier.
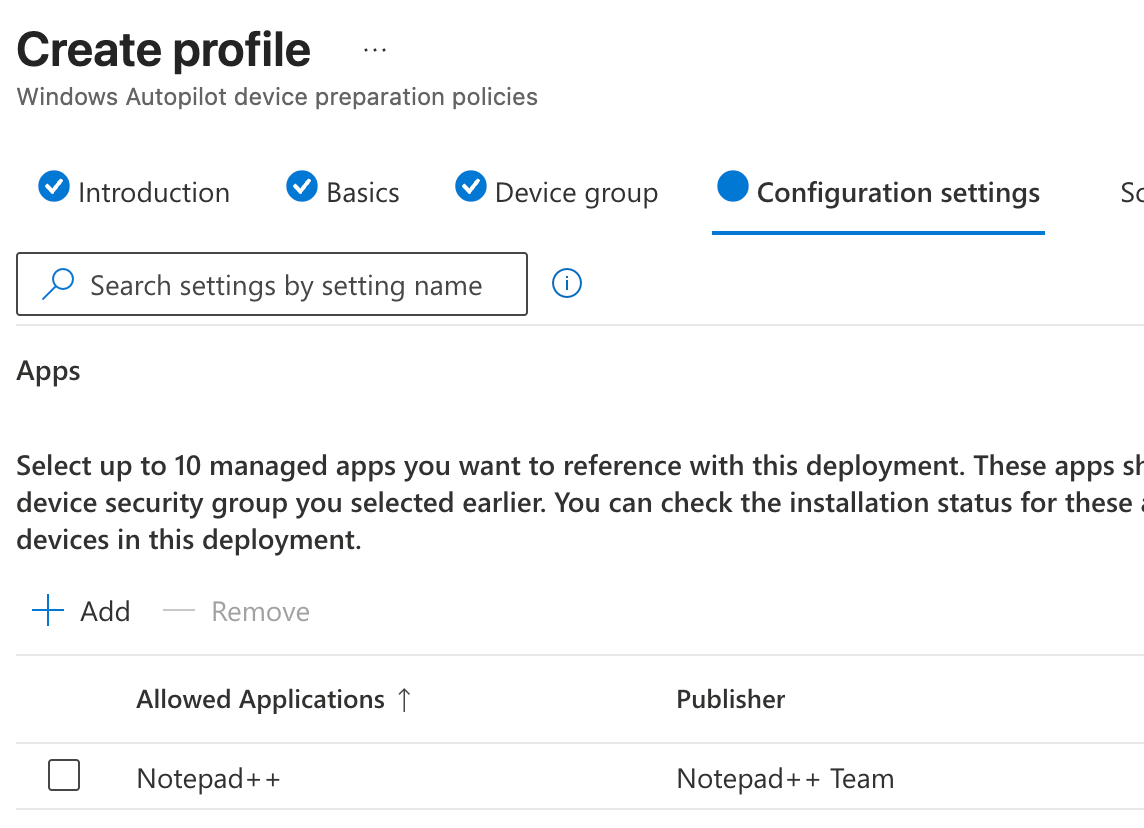
On the ‘configuration settings’ tab, we’ll select the app we want to install on the Cloud PC, so the Device Preperation Policy will take care of installing the app in the Cloud PC.
After finishing the wizard, we can move on to the next part: creating the actual provisioning policy.
Provisioning Policy
Provisioning policies dictate what the actual Cloud PC will look like. When using Cloud Apps, there still is an underlying Cloud PC that runs this app. So, we’ll need to build a provisioning policy for our app.
From the Windows 365 blade in Intune, we’ll go to the provisioning policy tab, and click create new.
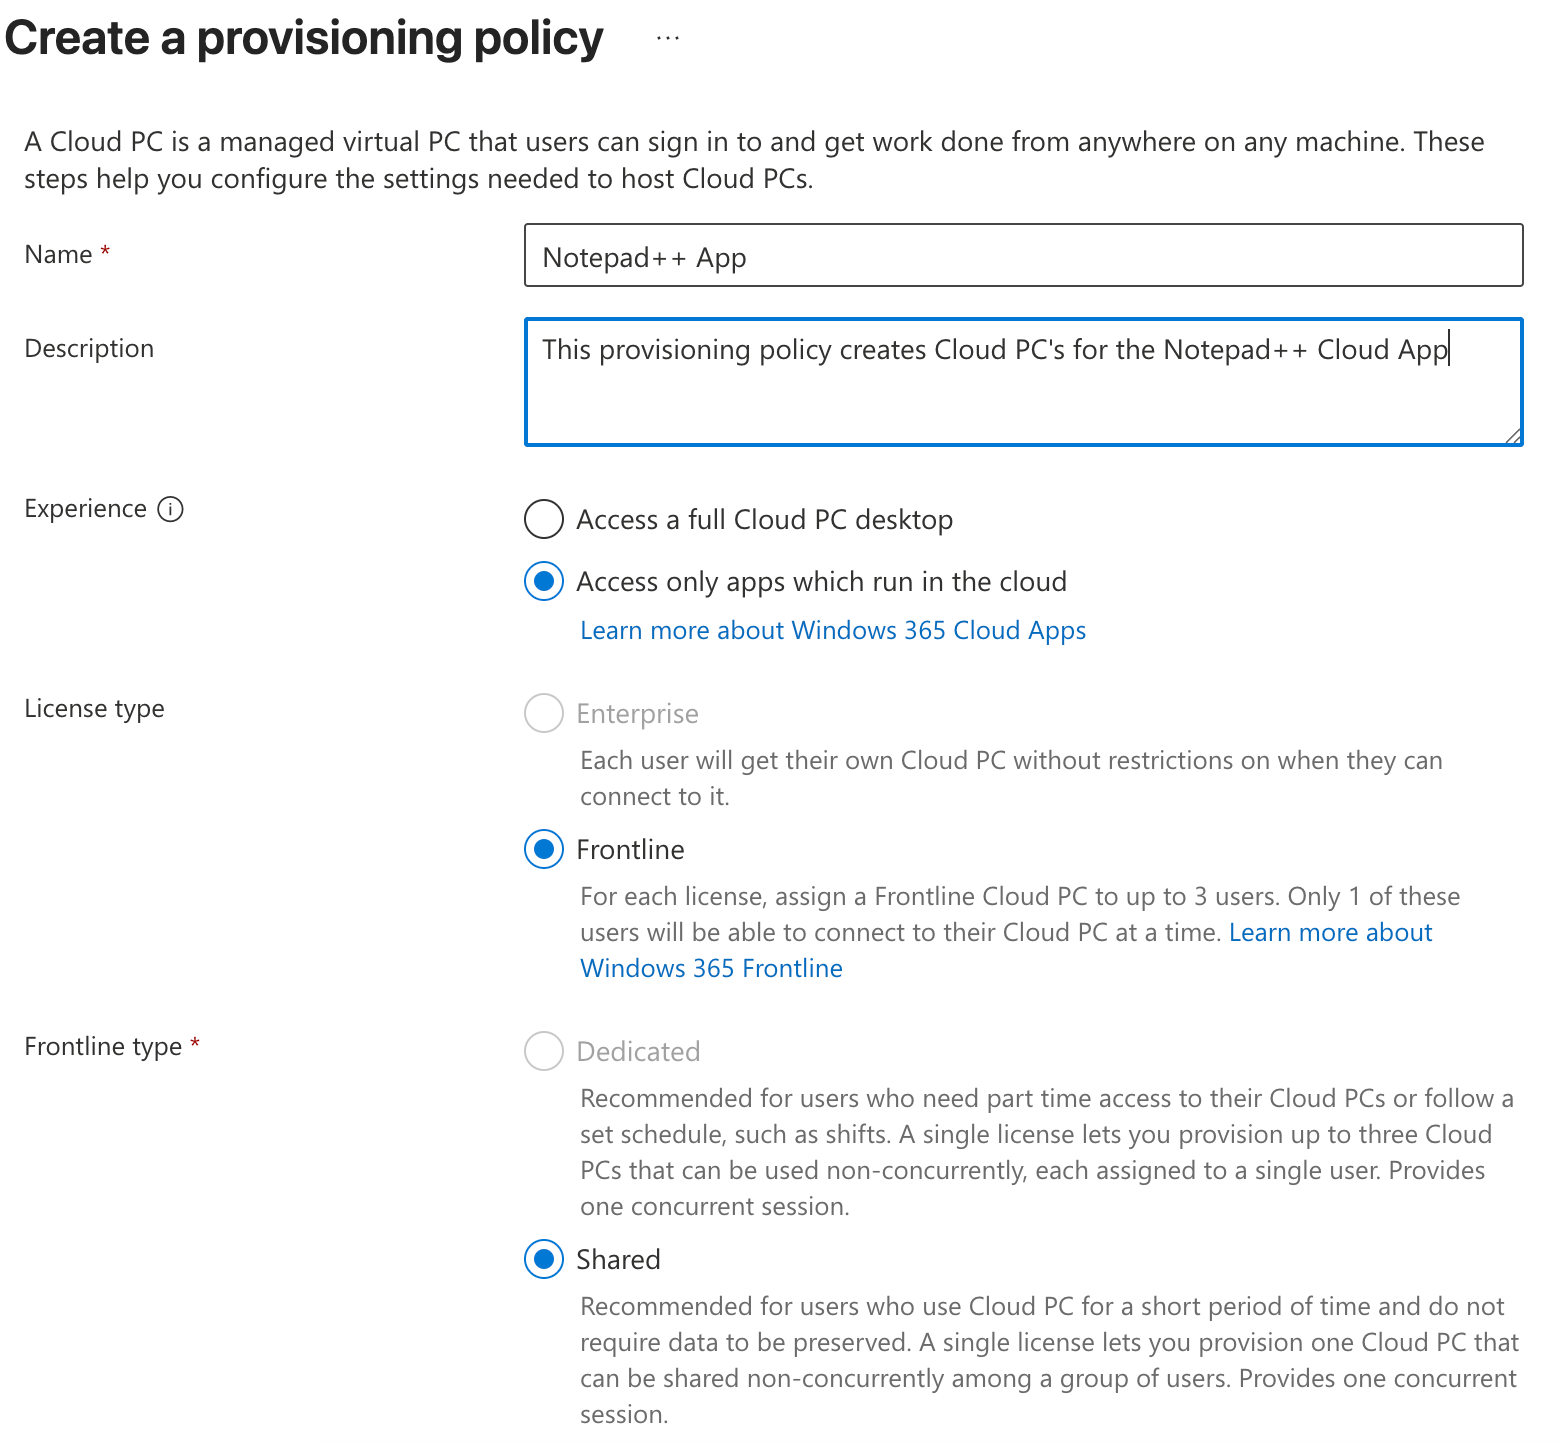
Apart from, obviously, naming it and providing a description, we’ll select the option to ‘access only apps which run in the cloud’. This will automatically set the license type to frontline and shared, as this is the type of licsense used for Cloud Apps.
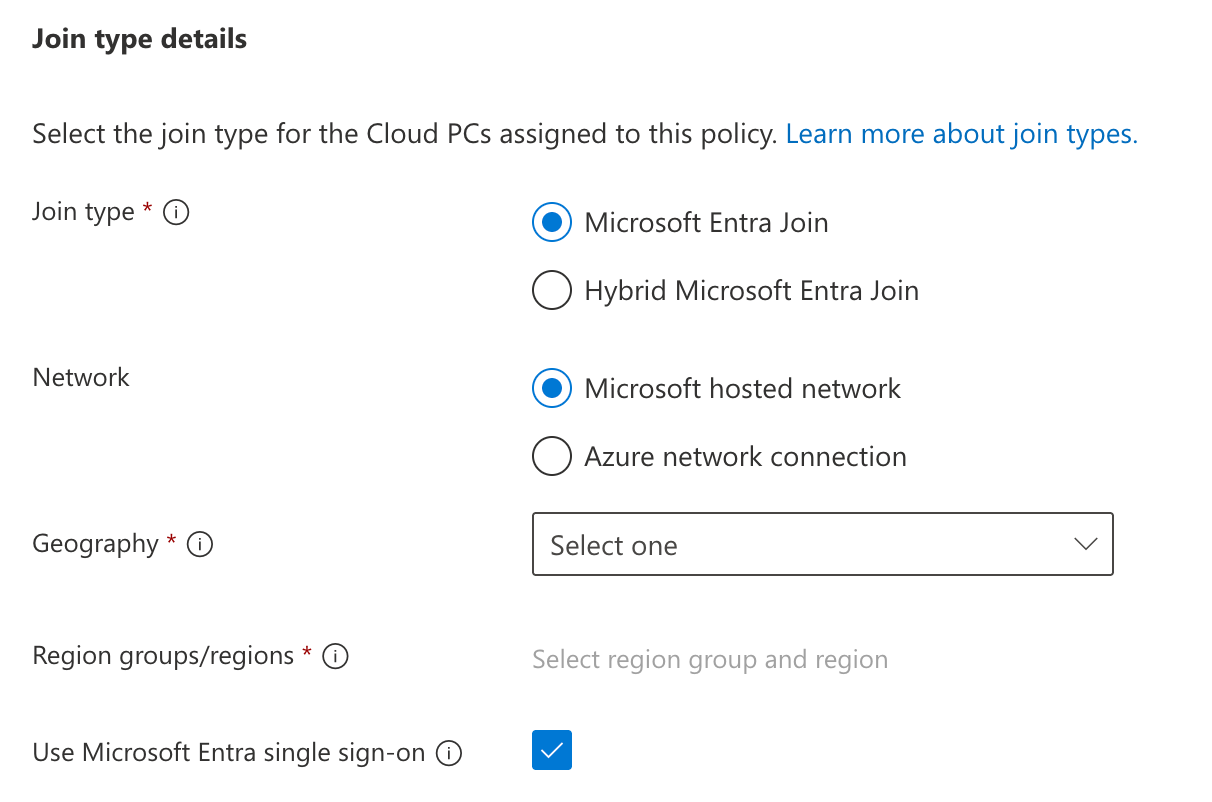
Next, we’ll set our required options for networking and using Entra single sign-on.
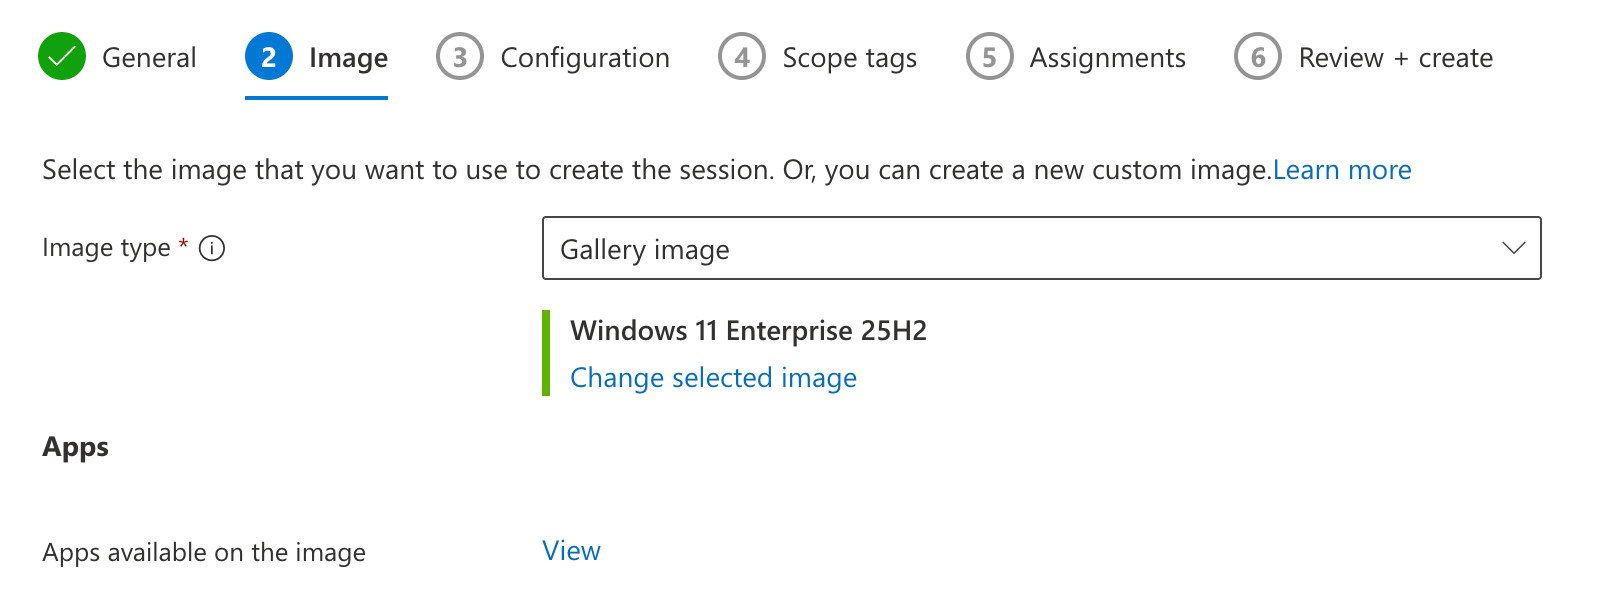
On the next tab, we’ll select the image to be used for our Cloud PC’s. You might select a custom image here, with your LOB apps already installed, but since I opted to use the preperation policy with an Intune app, I’ll select one of the gallery images here. In this case I don’t need any Office apps installed, so I’ll pick the Windows 11 25H2 version, without Office.
On the Configuration tab, we’ll further configure our provisioning policy.
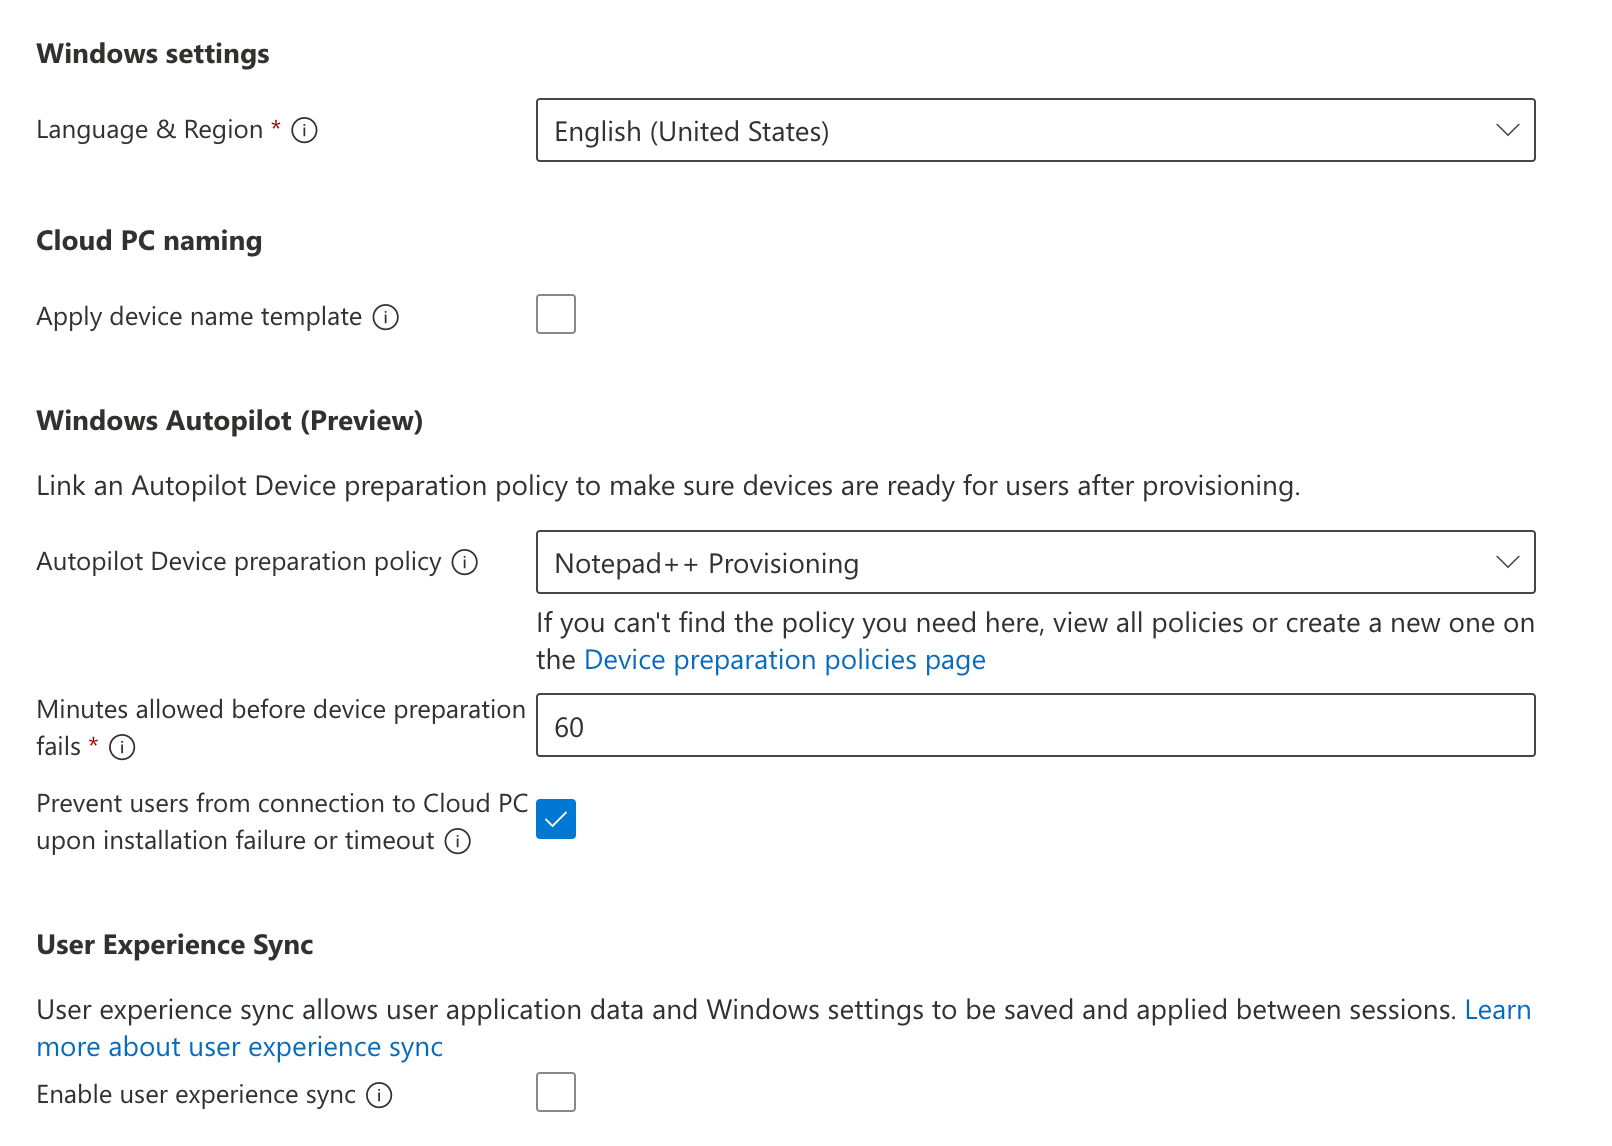
We choose the language and region to be used within the Cloud PC, we can define a naming template if we want to, and we’ll select the prepartion policy we created earlier. This will make sure that after the initial provisioning of the Cloud PC is done, the selected apps will be installed and the Cloud PC will be ready for use. We can also configure User Experience Sync if we want to.
After setting scope tags, when required, we’ll assign the policy to the user group we created.
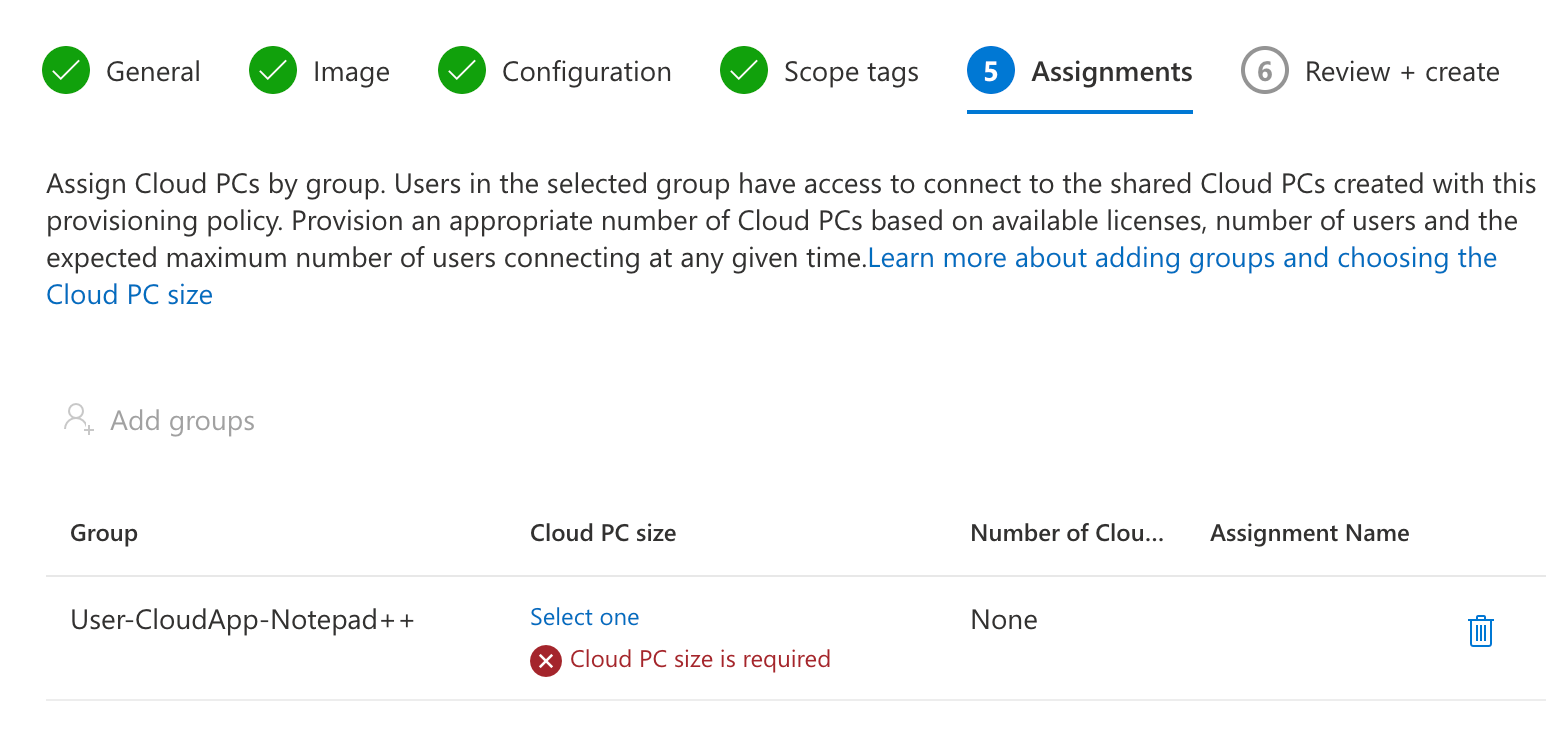
When the group is selected, we’ll need to configure the sizing used for this group by clicking the select onelink.
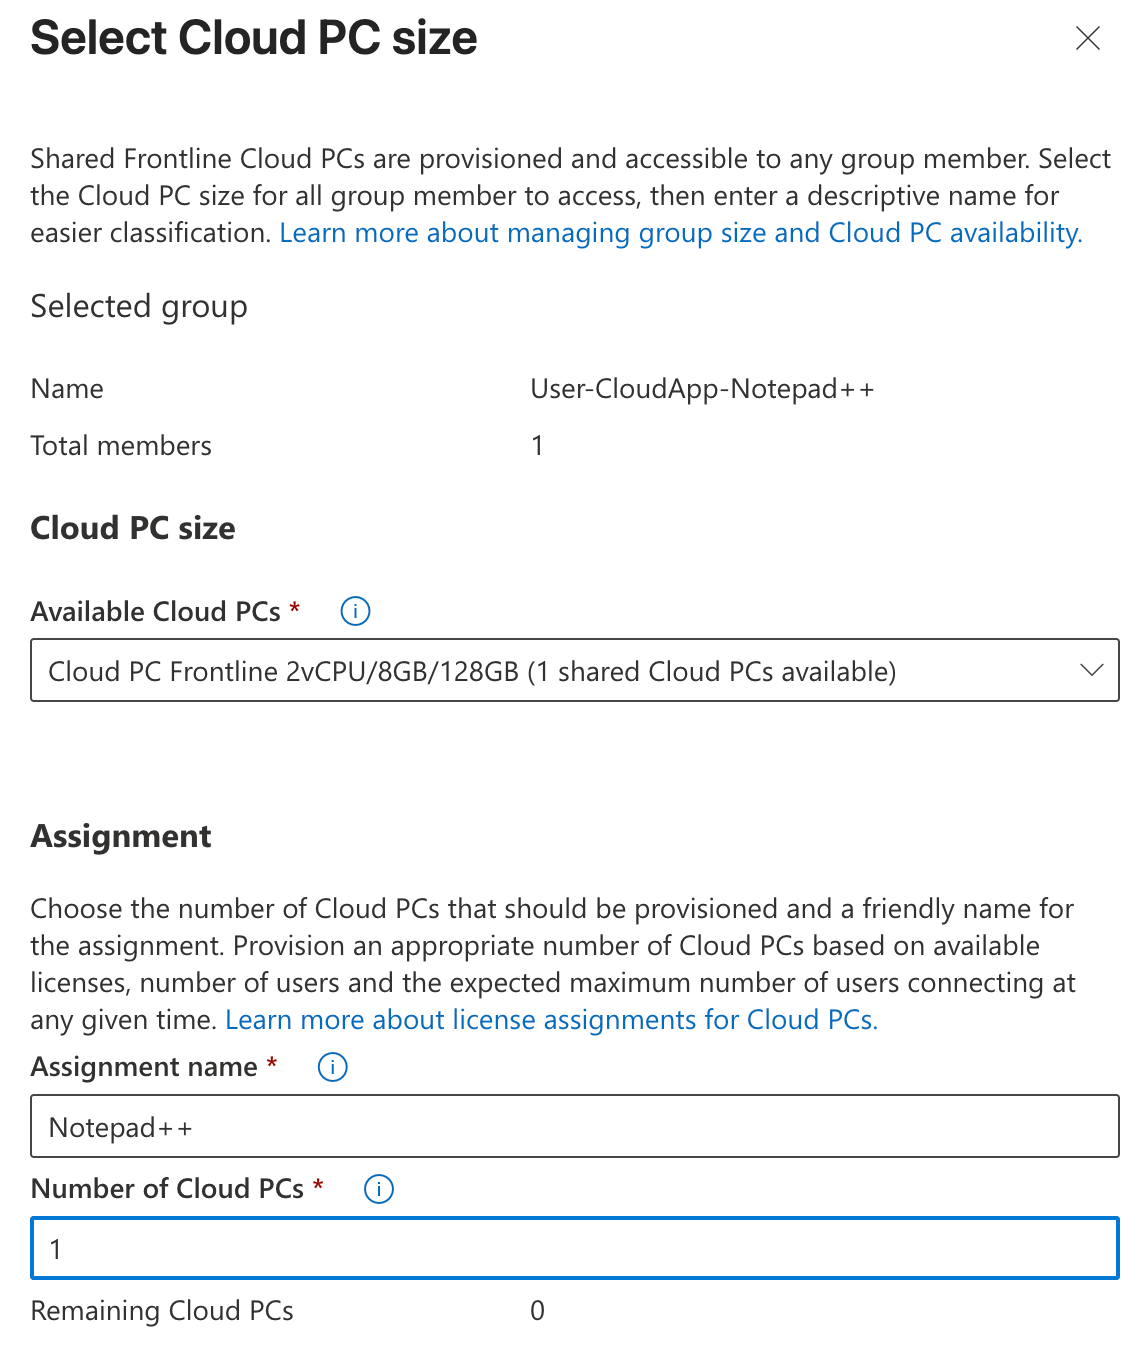
Your available Frontline licenses will show here, so you can select the right one. You enter a name for this assignment, and you provide the number of Cloud PC’s that should be provisioned. This will be the number of cuncurrent users you can have using this app.
After finishing the wizard, we can go to the ‘All Cloud PC’s’ tab, and see that the platform has started provisioning the actual Cloud PC.

Publishing apps
Now that the Cloud PC configuration is set up, it’s time to get to the actual Cloud App publishing. We’ll switch to the ‘All Cloud Apps’ tab in the portal. Here, we should see a list of all Cloud Apps that are on the Cloud PC’s created with a provisioning policy for publishing apps. In this case, as our Cloud PC is still in a provisioning state, no app is shown yet.
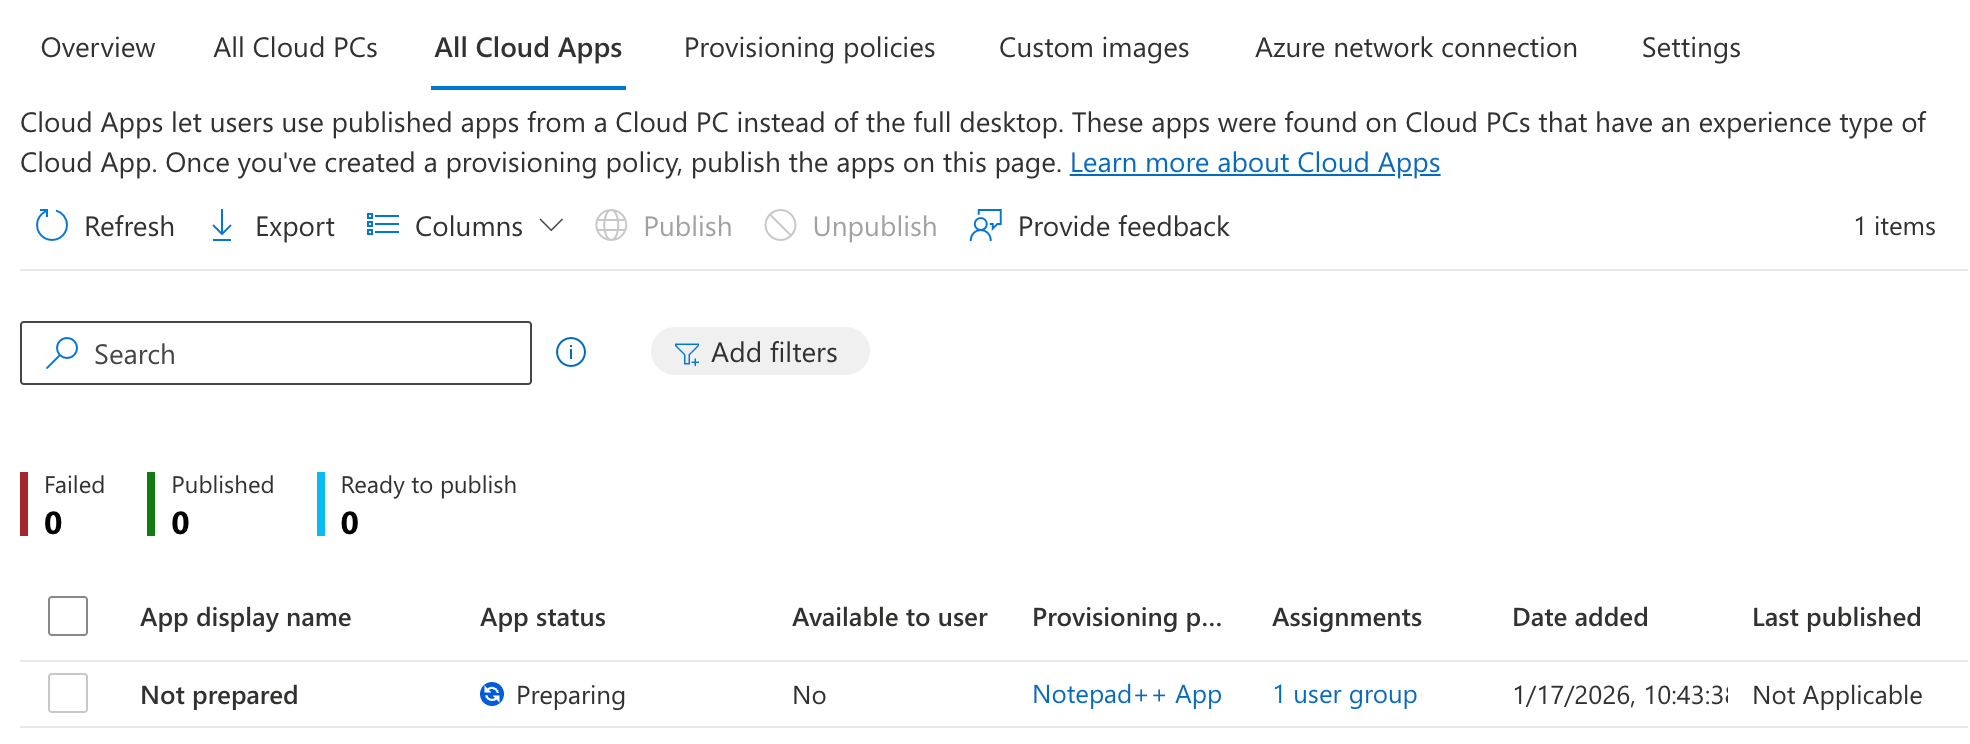
We’ll have to wait for a while… Like described earlier, the first step is the Cloud PC provisioning. After that, the device preperation policy will take over and the Cloud PC will be in a preparing state.

Only after that, all apps, including the apps that are installed based on the device preperation policy, will be visible in the ‘All Cloud Apps’ tab.

In the ‘All Cloud Apps’ tab we can then select the app we want to publish, and click the ‘publish’ button.
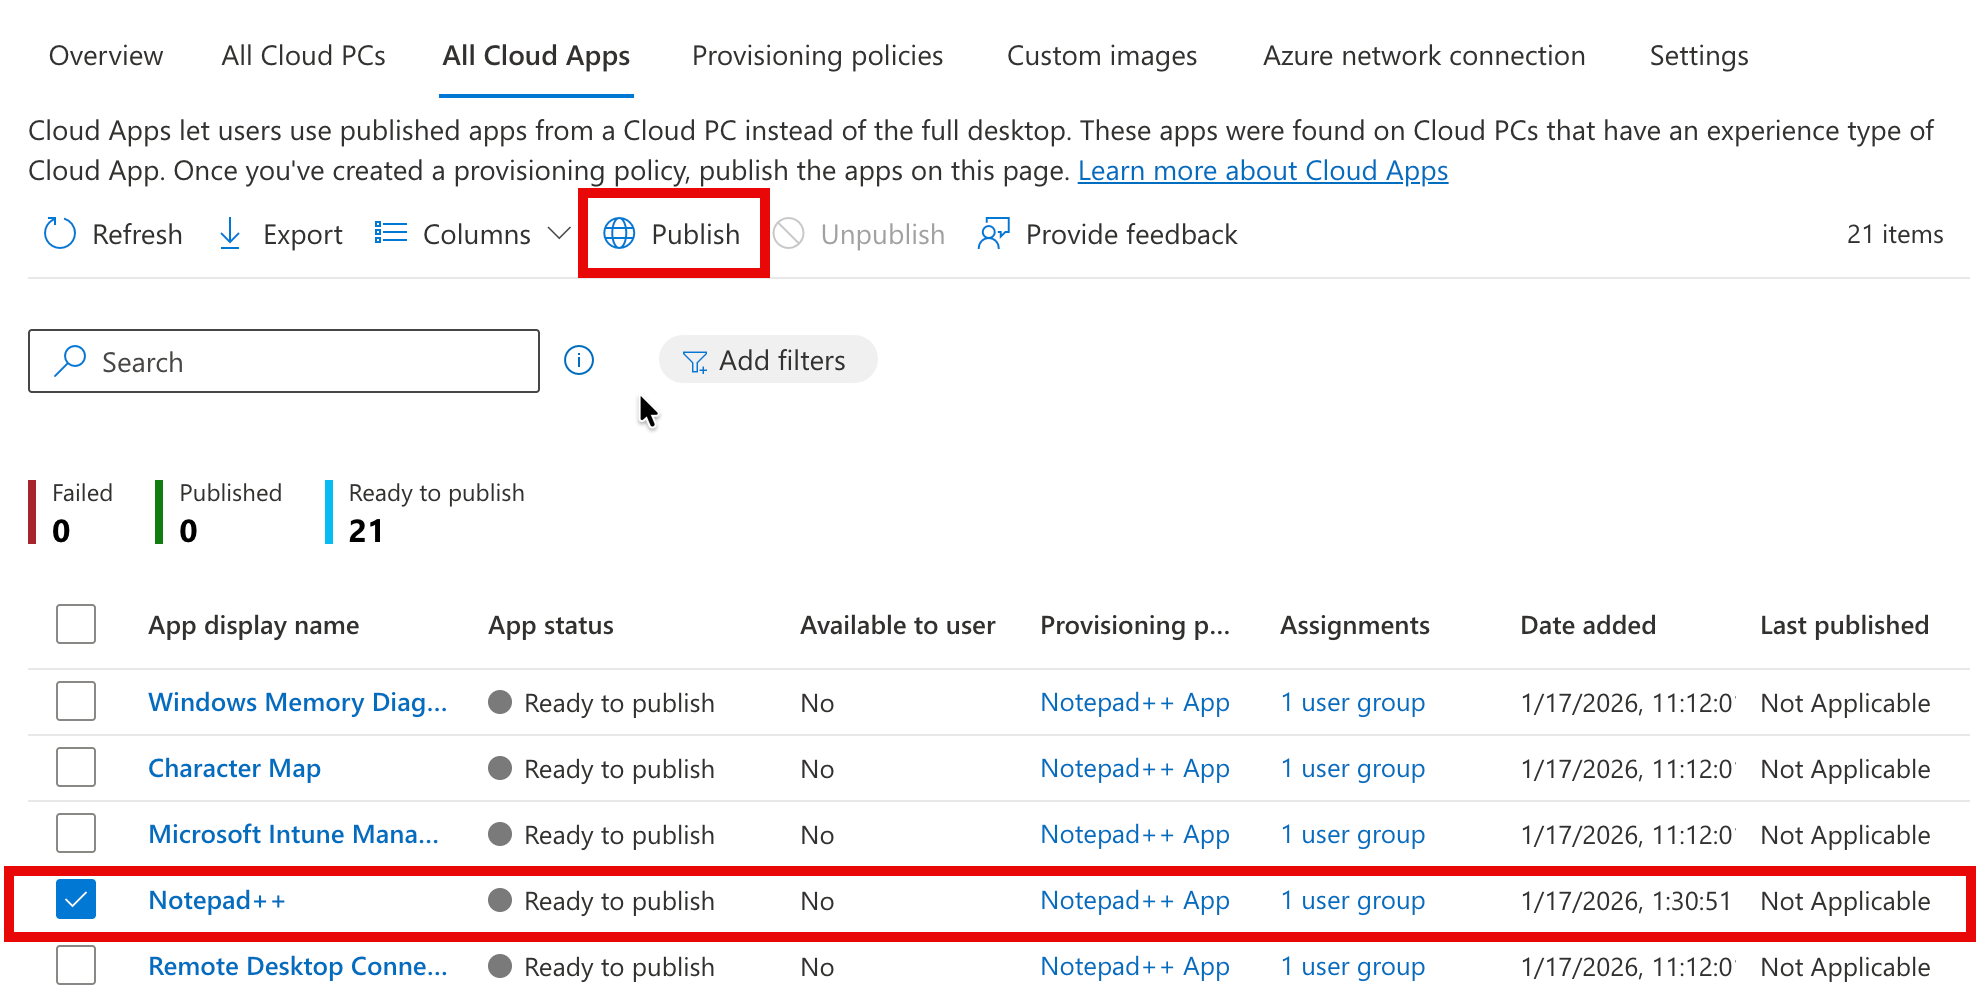
After confirming, the app will start publishing.

After a short time, the app will show as ‘published’.

That’s it. We have succcesfully published a Cloud App to our users so they can start using it from the Windows 365 environment.
End user experience
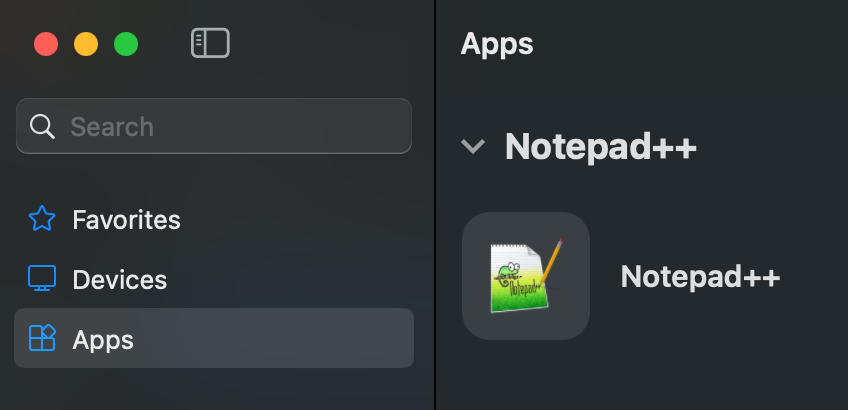
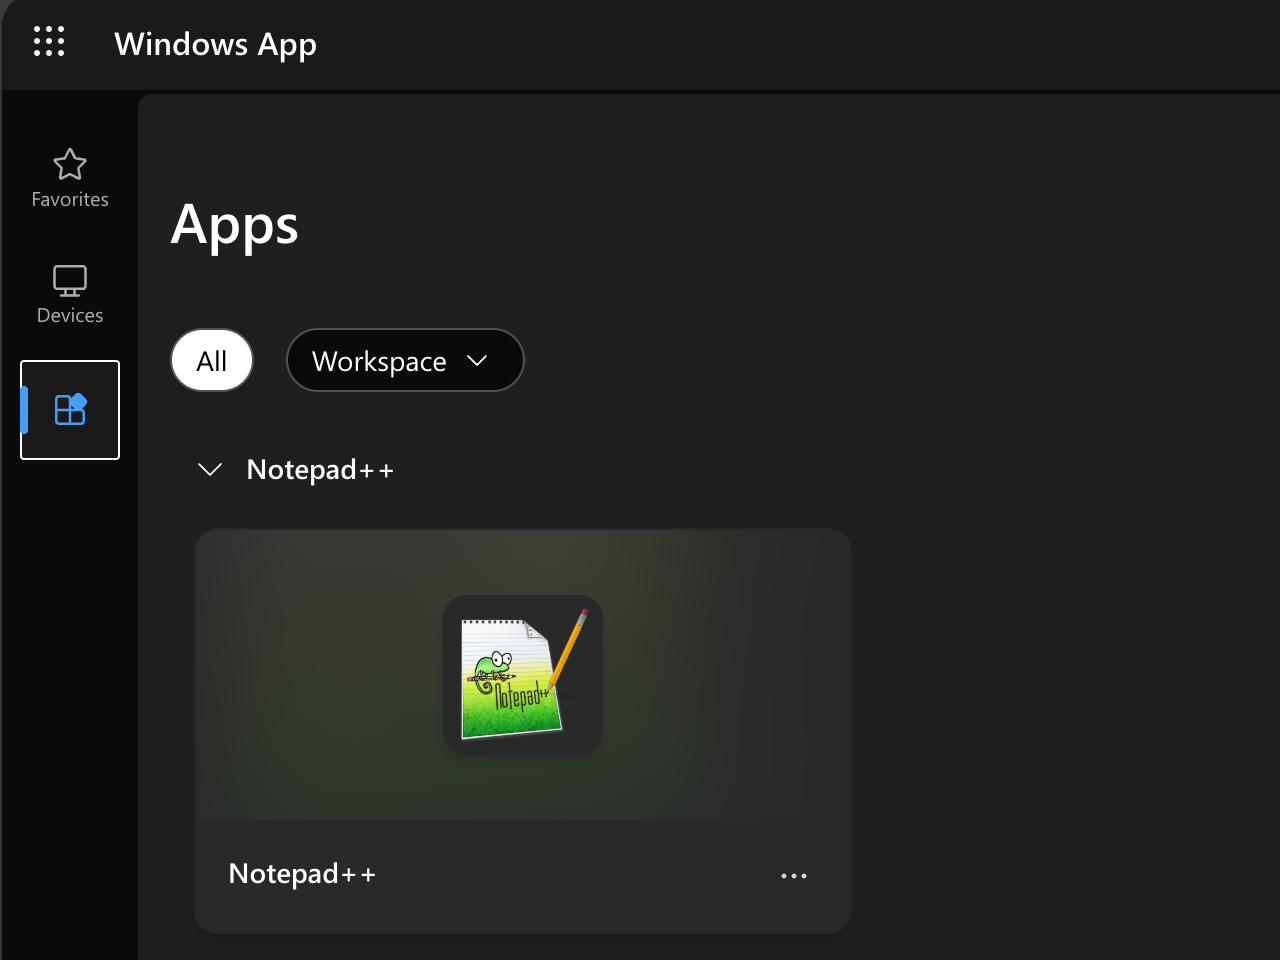
When the app is published, it’s visible for the end user through the various Windows app (on all different platforms) or via the browser.
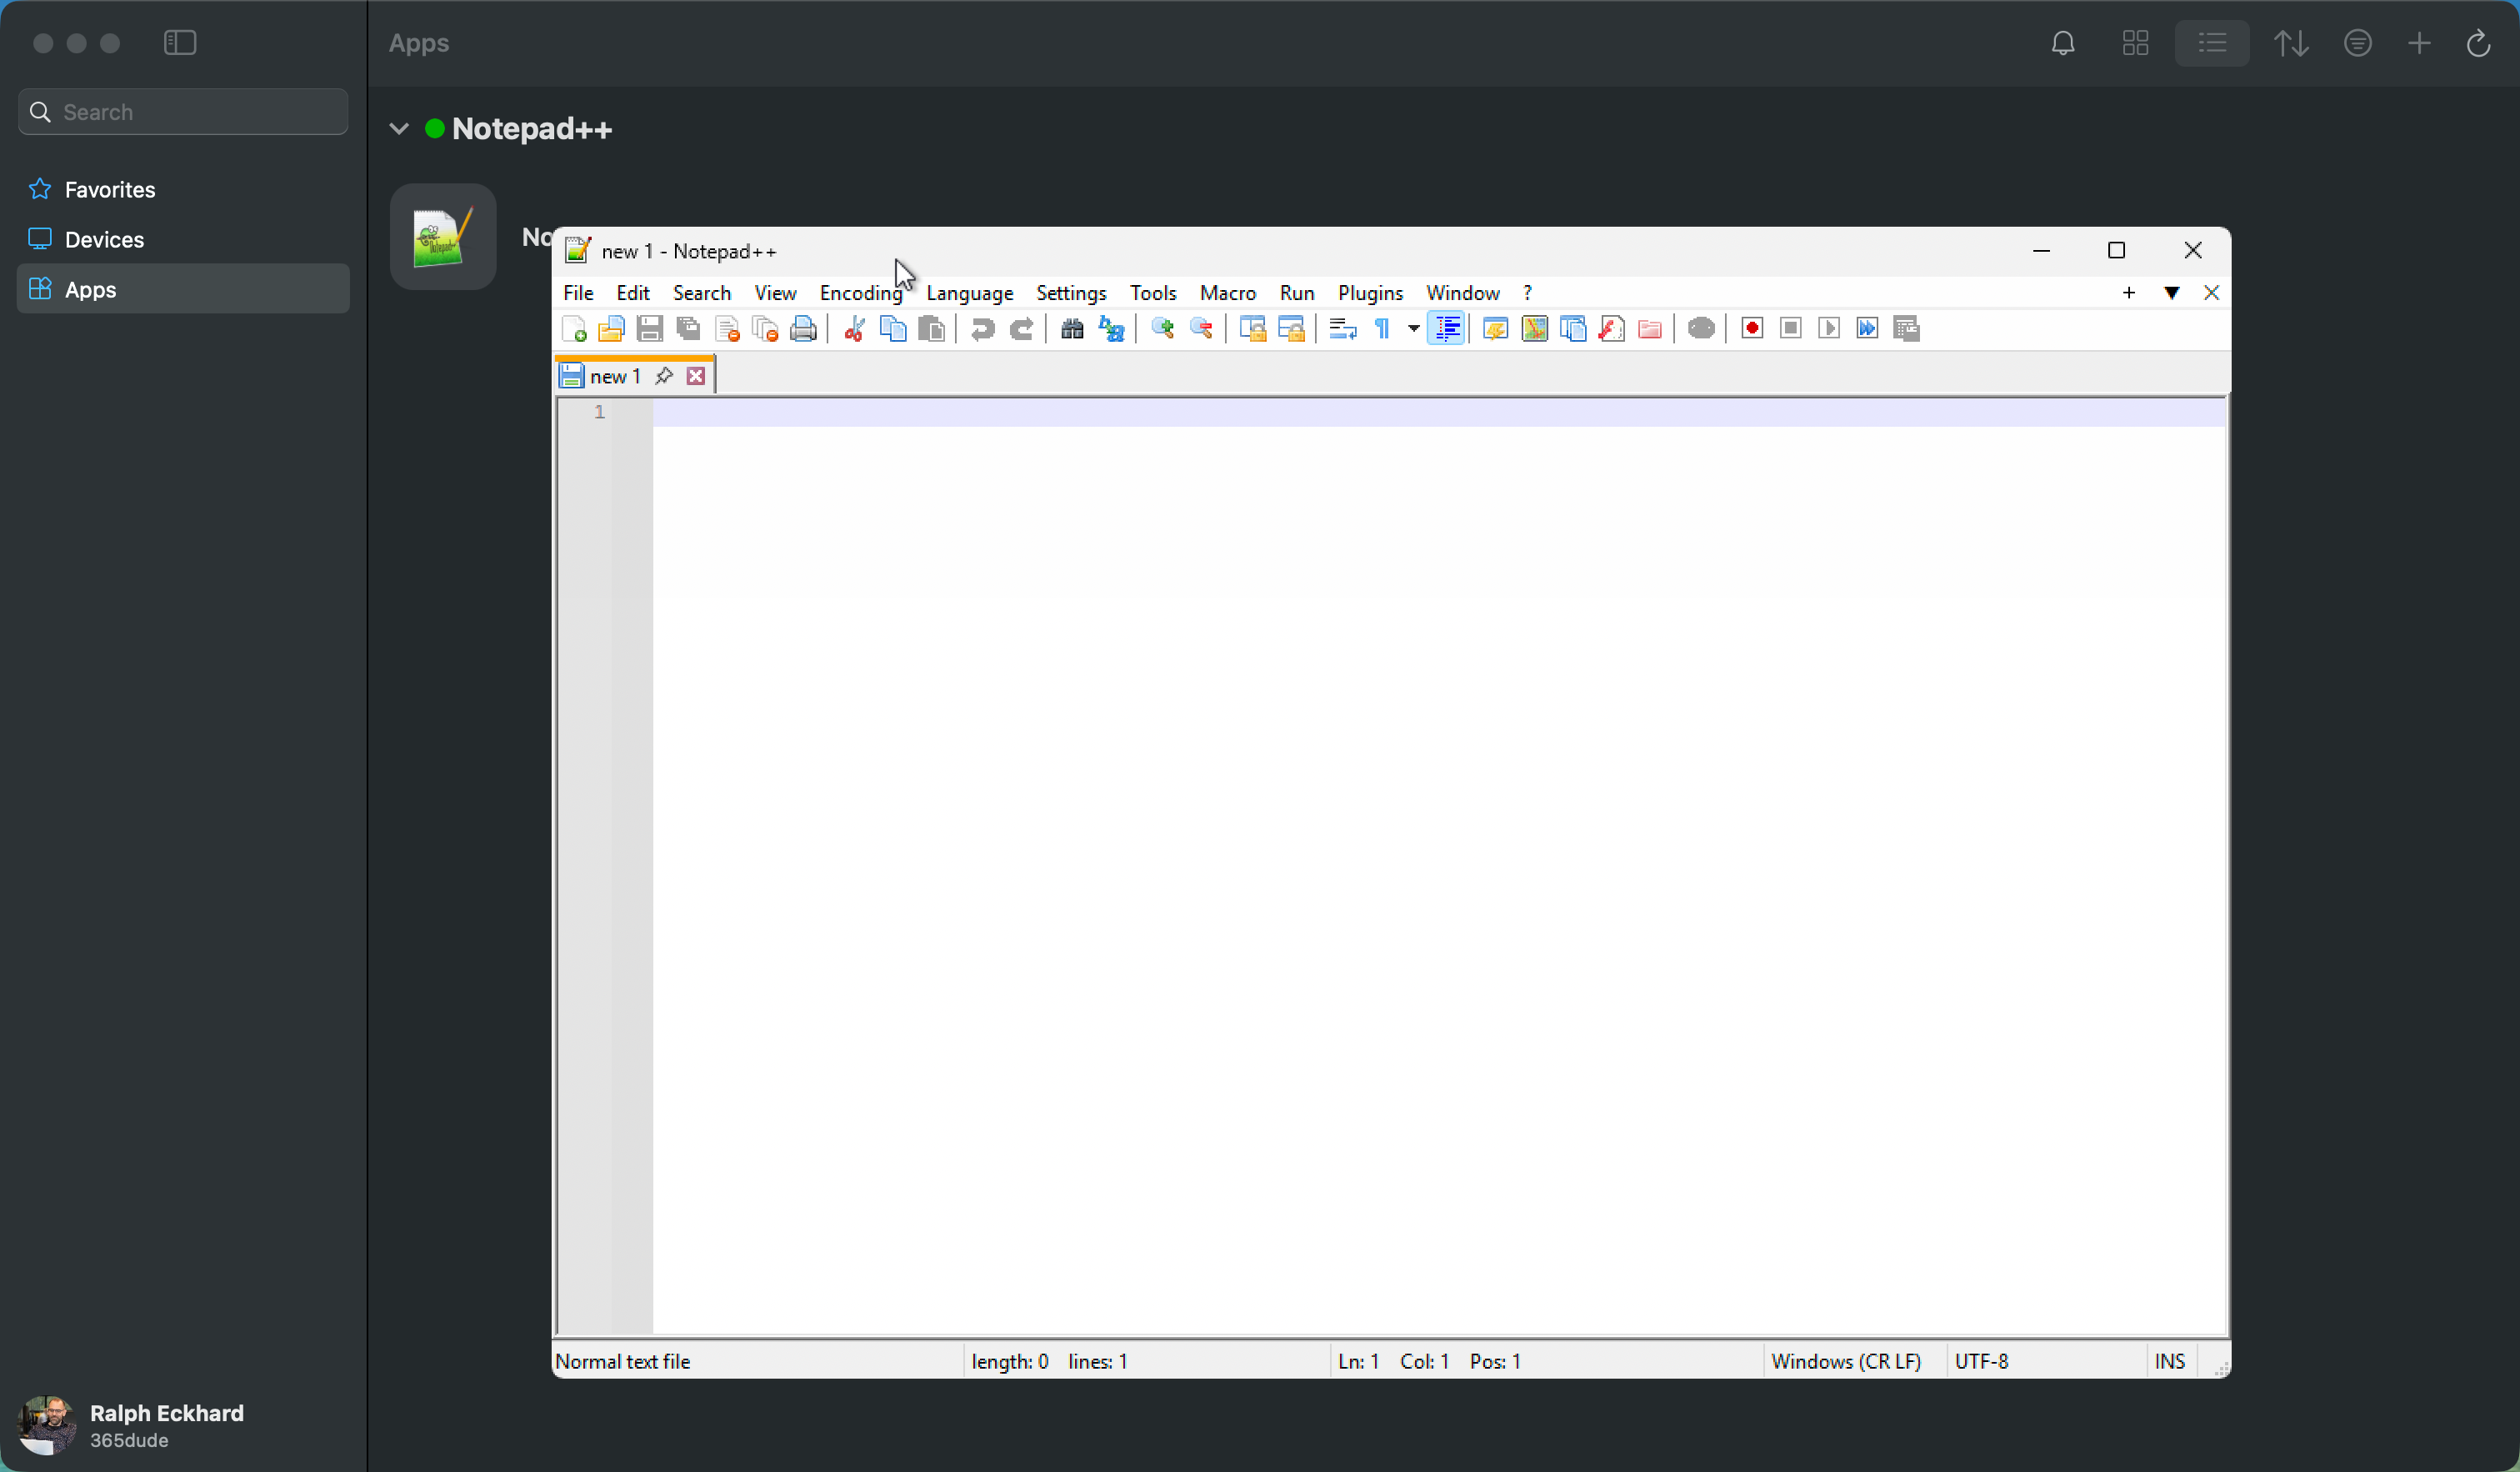
For example, in the Windows app for Mac the app will show in the ‘apps’ section.
In the browser, the experience is simmilar.
When clicking the app, it will be started as if it’s running natively on your system.
In this example, I’ll run Notepad++ (which is a Windows app) from the Windows App on my Mac, which makes it look like it’s running locally on my system.
Take-aways
Setting up Cloud Apps is fairly straight-forward. Keep an eye if you want to combine multiple apps in one policy, or if you go for separating every app. The licensing makes it a relatively cheap option, because you pay for concurrent sessions and not for each individual user.
When you combine Cloud Apps with the device preparation policy, as in my examples, you ‘decouple’ the app updates from the images, which makes for easier management.
The end-user experience is very easy, and you have a way to provide those pesky Mac users with applications that would normaly be Windows-only!